
Brick Floor Inc.
Brick Installation & Patterns: A Homeowner's Guide
Project Guide:
Plan Your Interior Flooring
Brick Floor Inc.
Installing brick, whether for a wall or a floor, involves a detailed process from conception to completion. Before starting, homeowners should thoroughly assess the space's specific needs with their mason. The stability of the foundation or subfloor, for instance, is crucial. A robust and level base, often made of concrete, is necessary to ensure longevity and prevent future complications.
Pre-Installation
Pre-installation planning is a crucial phase in which homeowners should work closely with their mason. This phase includes selecting the appropriate type of bricks that meet the aesthetic requirements and are suitable for the local environment and specific uses, such as in high moisture areas. Discussing and deciding on the brick pattern is equally important, as the pattern impacts the overall aesthetics and the structural alignment of the installation. High-quality mortar, especially one with water-repellent properties, is essential to prevent long-term moisture issues. While the mason will handle the specifics, homeowners should know how materials are estimated, including allowances for potential waste and breakage.
Installation Patterns
Running Bond or Stretcher Bond
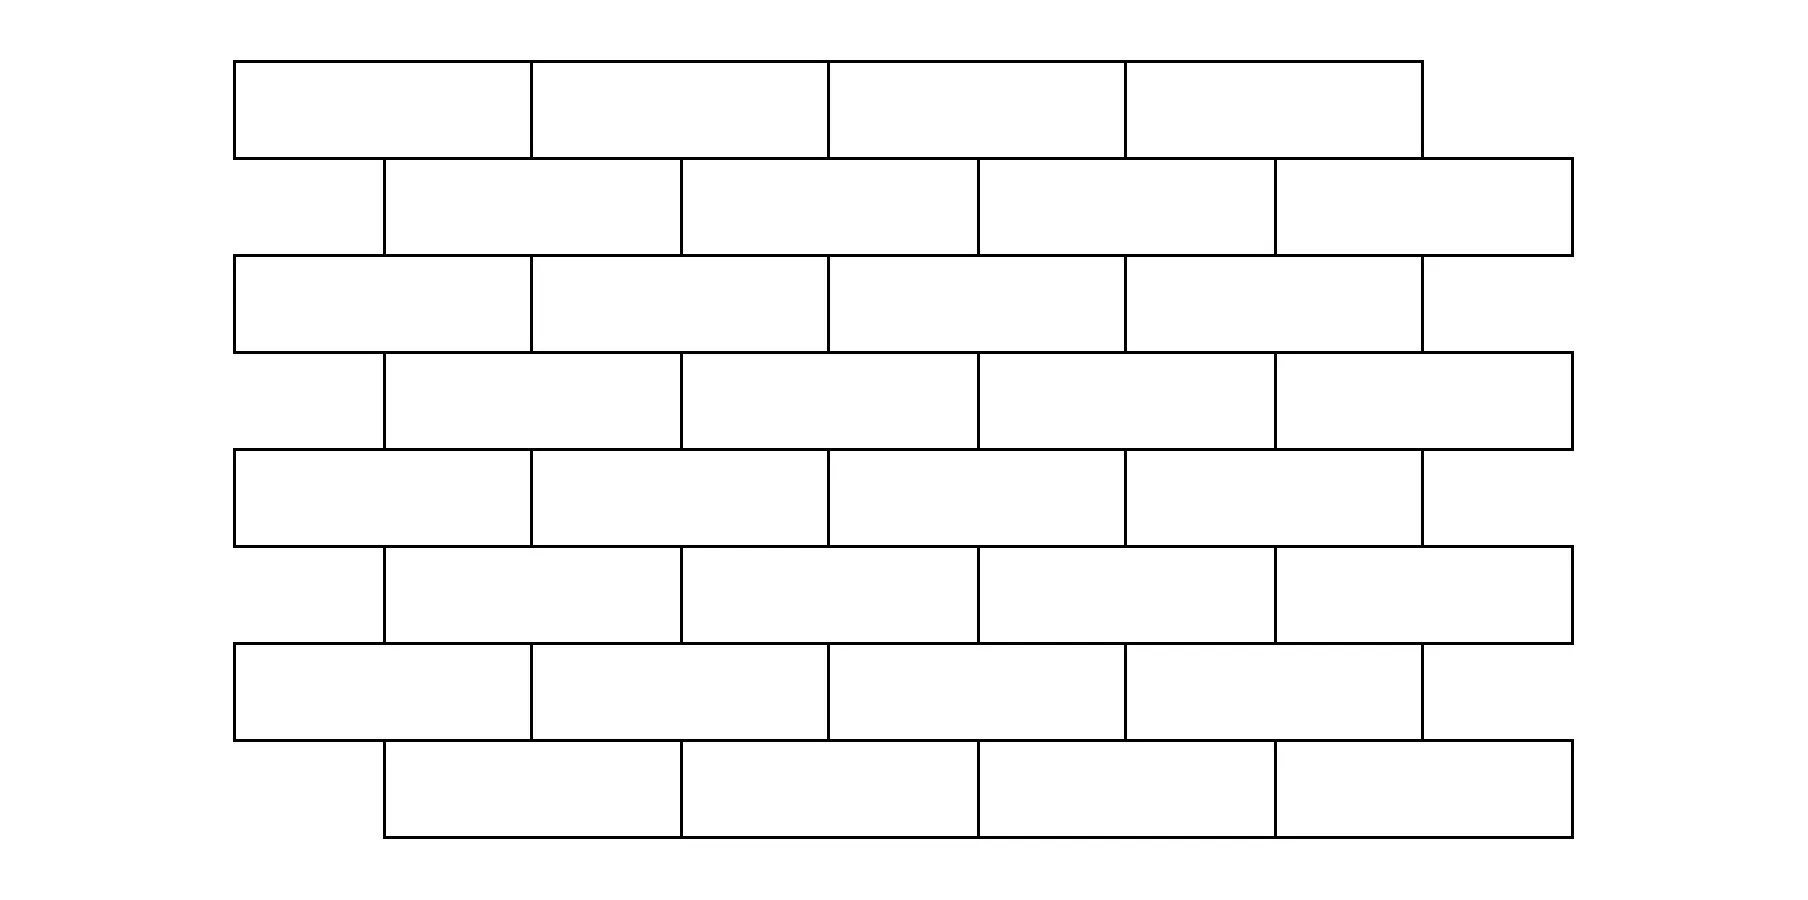
This is the most traditional and recognizable pattern for brick installation. Bricks are laid end-to-end rows, offset by half a brick's width from the row above or below it. It's a timeless look that can be used in almost any setting.
Stacked or Grid

In this pattern, bricks are laid directly on top and beside each other in a straightforward grid pattern, creating a modern and clean look.
Herringbone
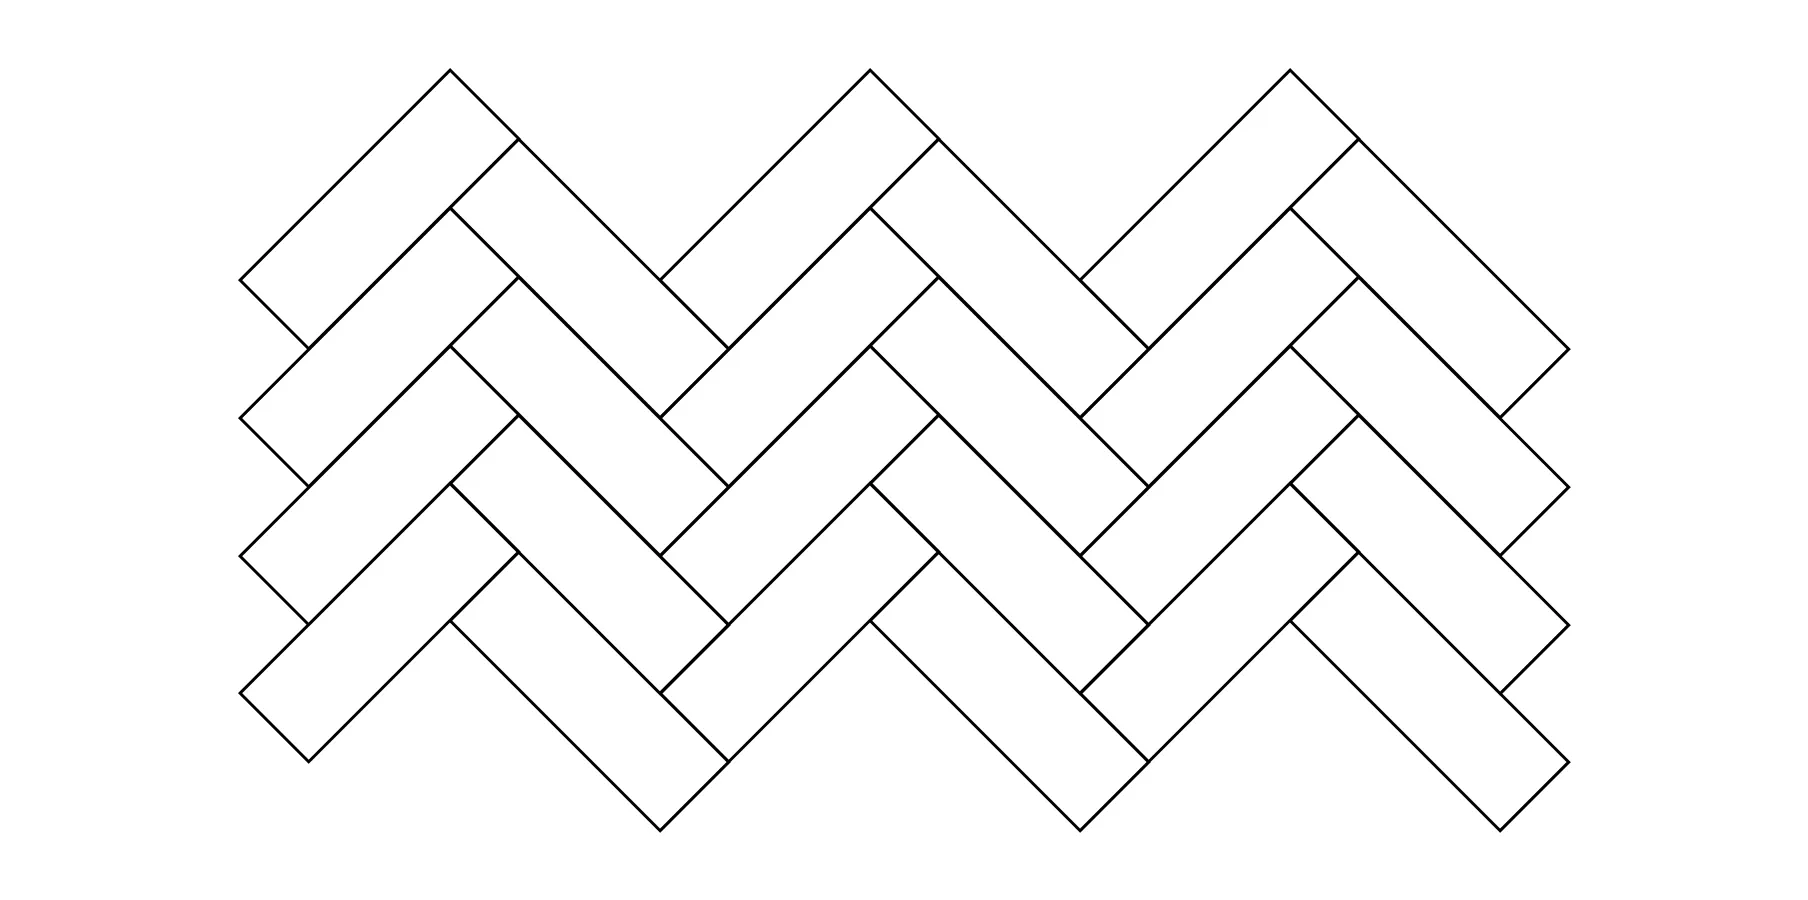
Bricks are laid in a V-shape pattern. It's a dynamic layout that adds movement to the space. It's often used for pathways or patio spaces but can be applied indoors for a striking effect.
Flemish Bond
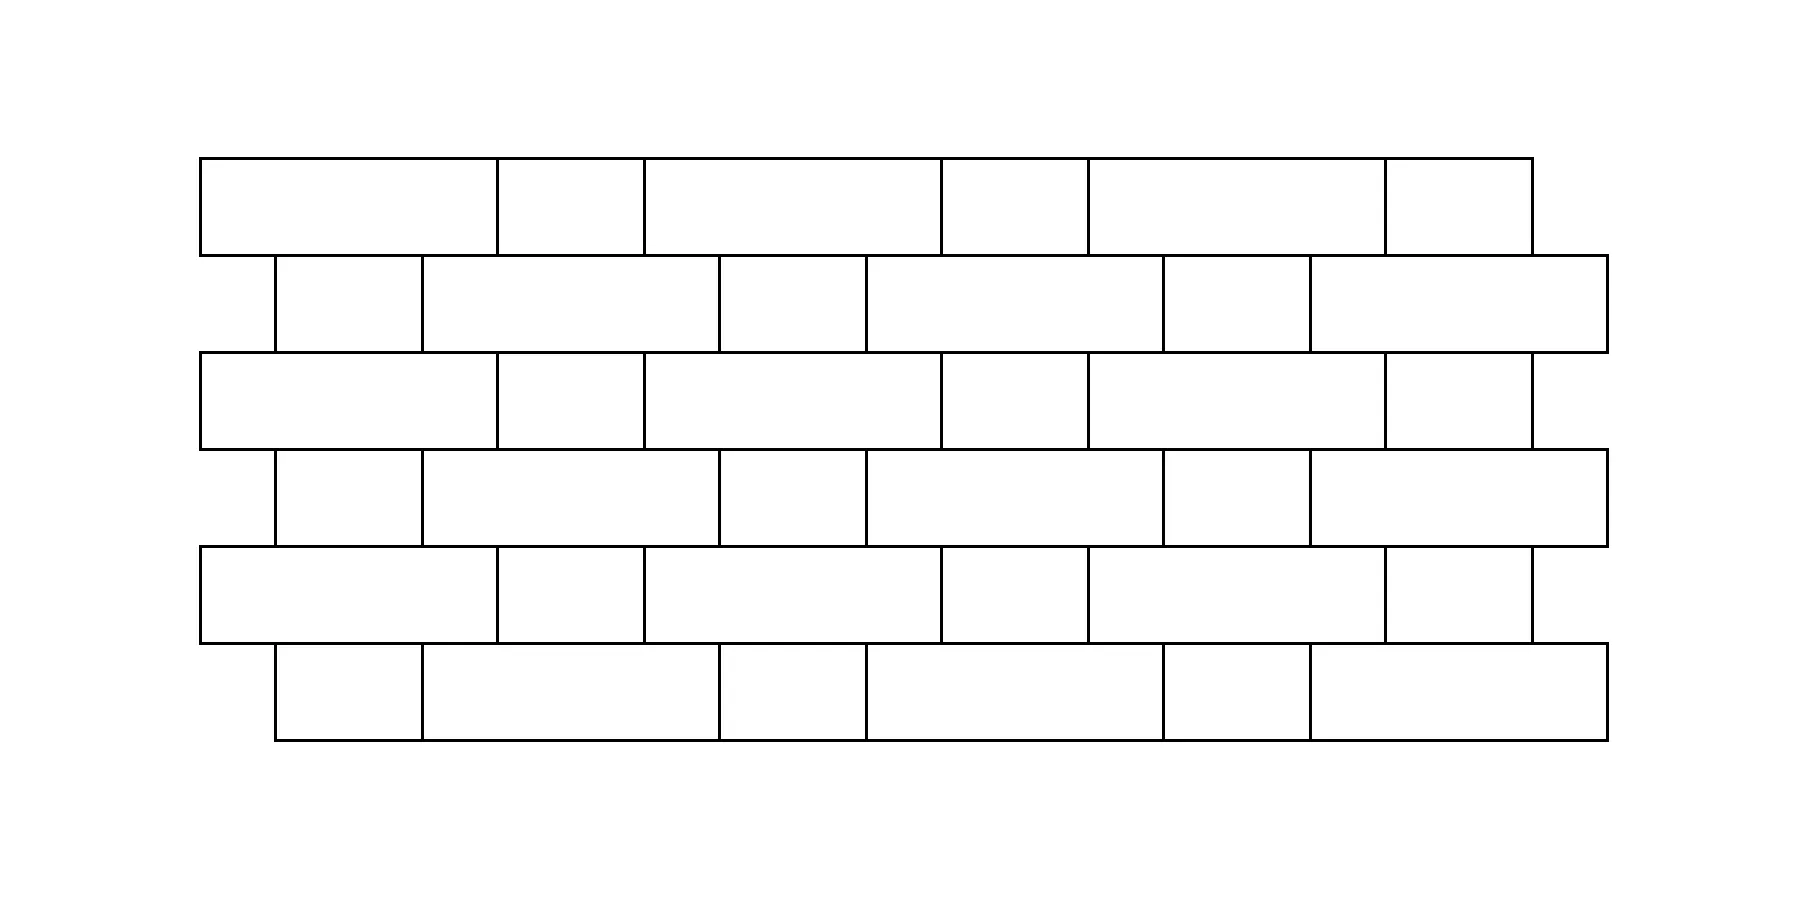
This classic pattern alternates between a header (short side of the brick) and a stretcher (long side) in each course or row. This creates an attractive alternating pattern and is often used for aesthetic appeal in exterior walls.
Spanish Bond
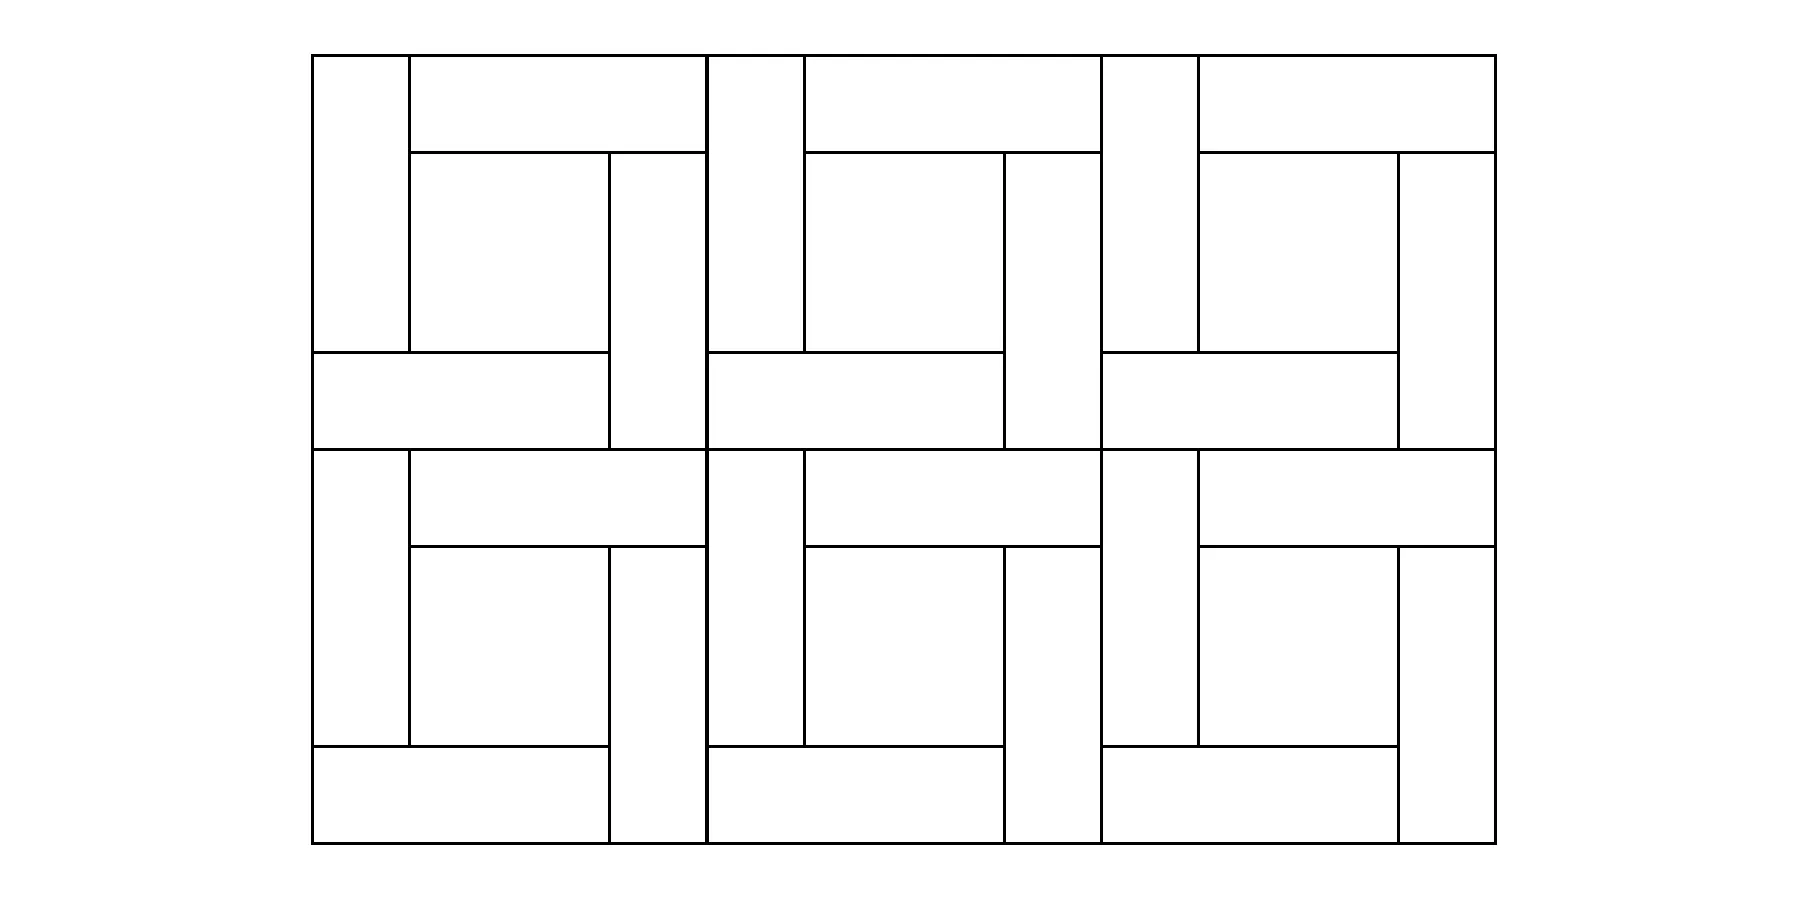
This pattern involves leaving gaps or spaces between certain bricks, which are then filled with decorative tiles or stones. It's a unique design that can add a touch of ornamental flair to a project.
Pin Wheel
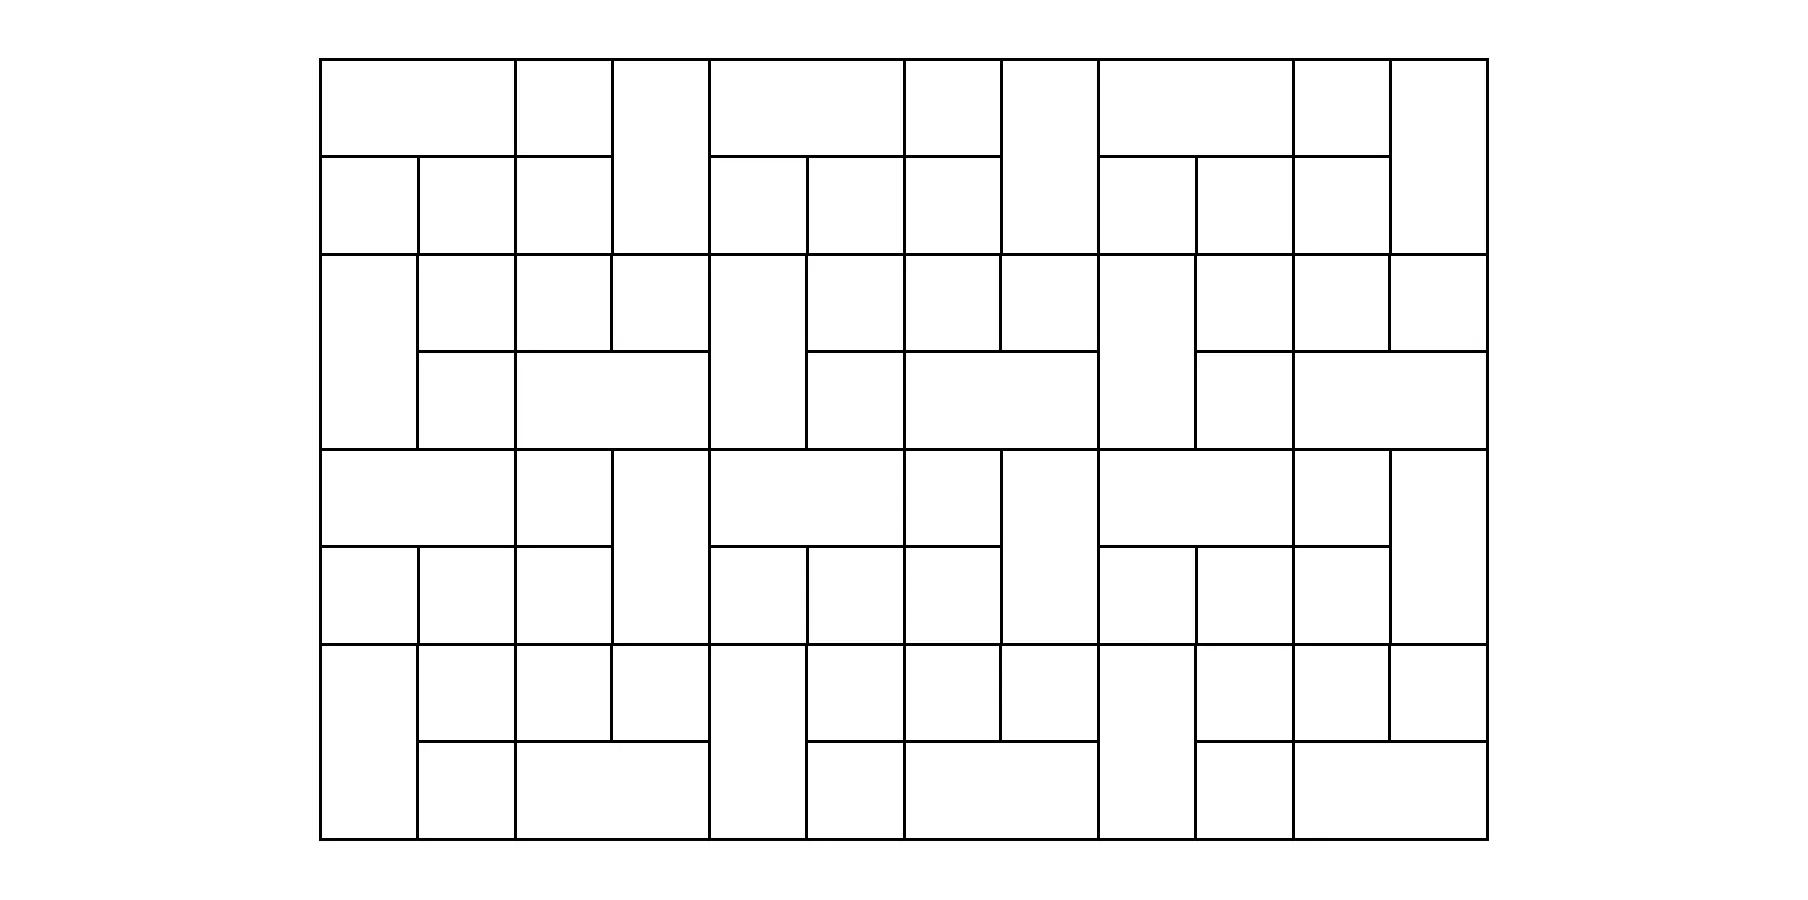
This pattern involves four bricks in a square, with a fifth brick in the center, perpendicular to the others. It resembles a pinwheel, and the pattern can be repeated across a floor or wall.
Basket Weave Horizontal
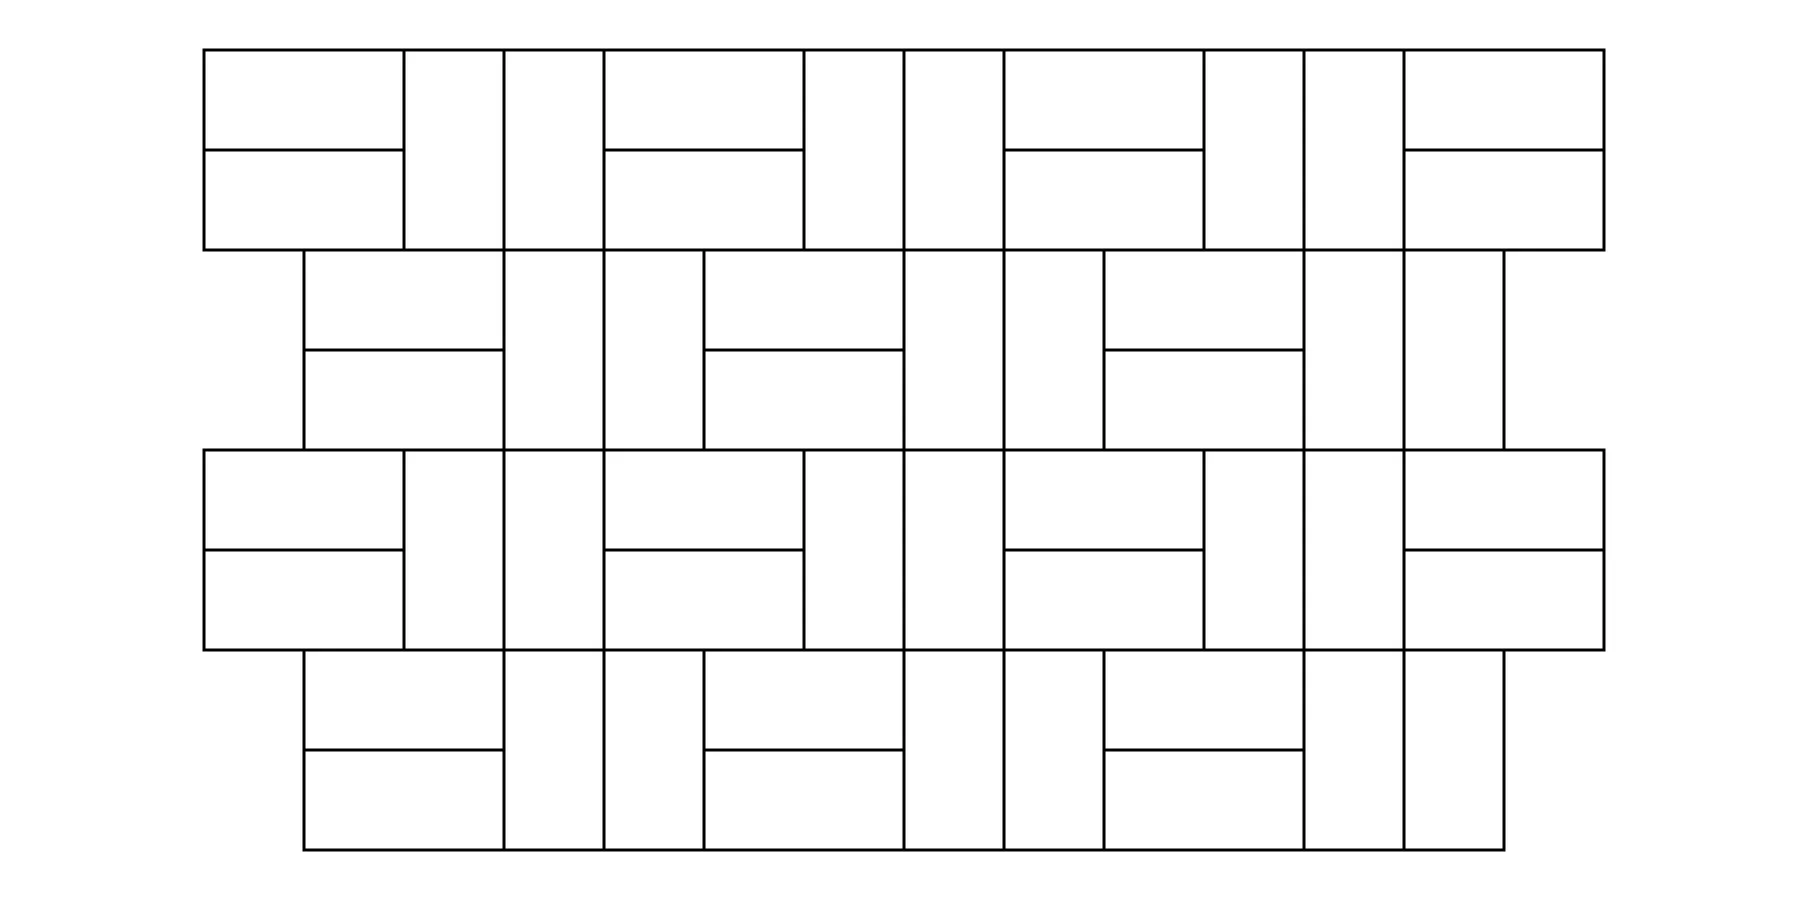
Imagine two bricks laid horizontally next to each other, followed by two bricks laid vertically, and then the pattern is repeated. It resembles a woven basket, hence the name.
Basket Weave Vertical
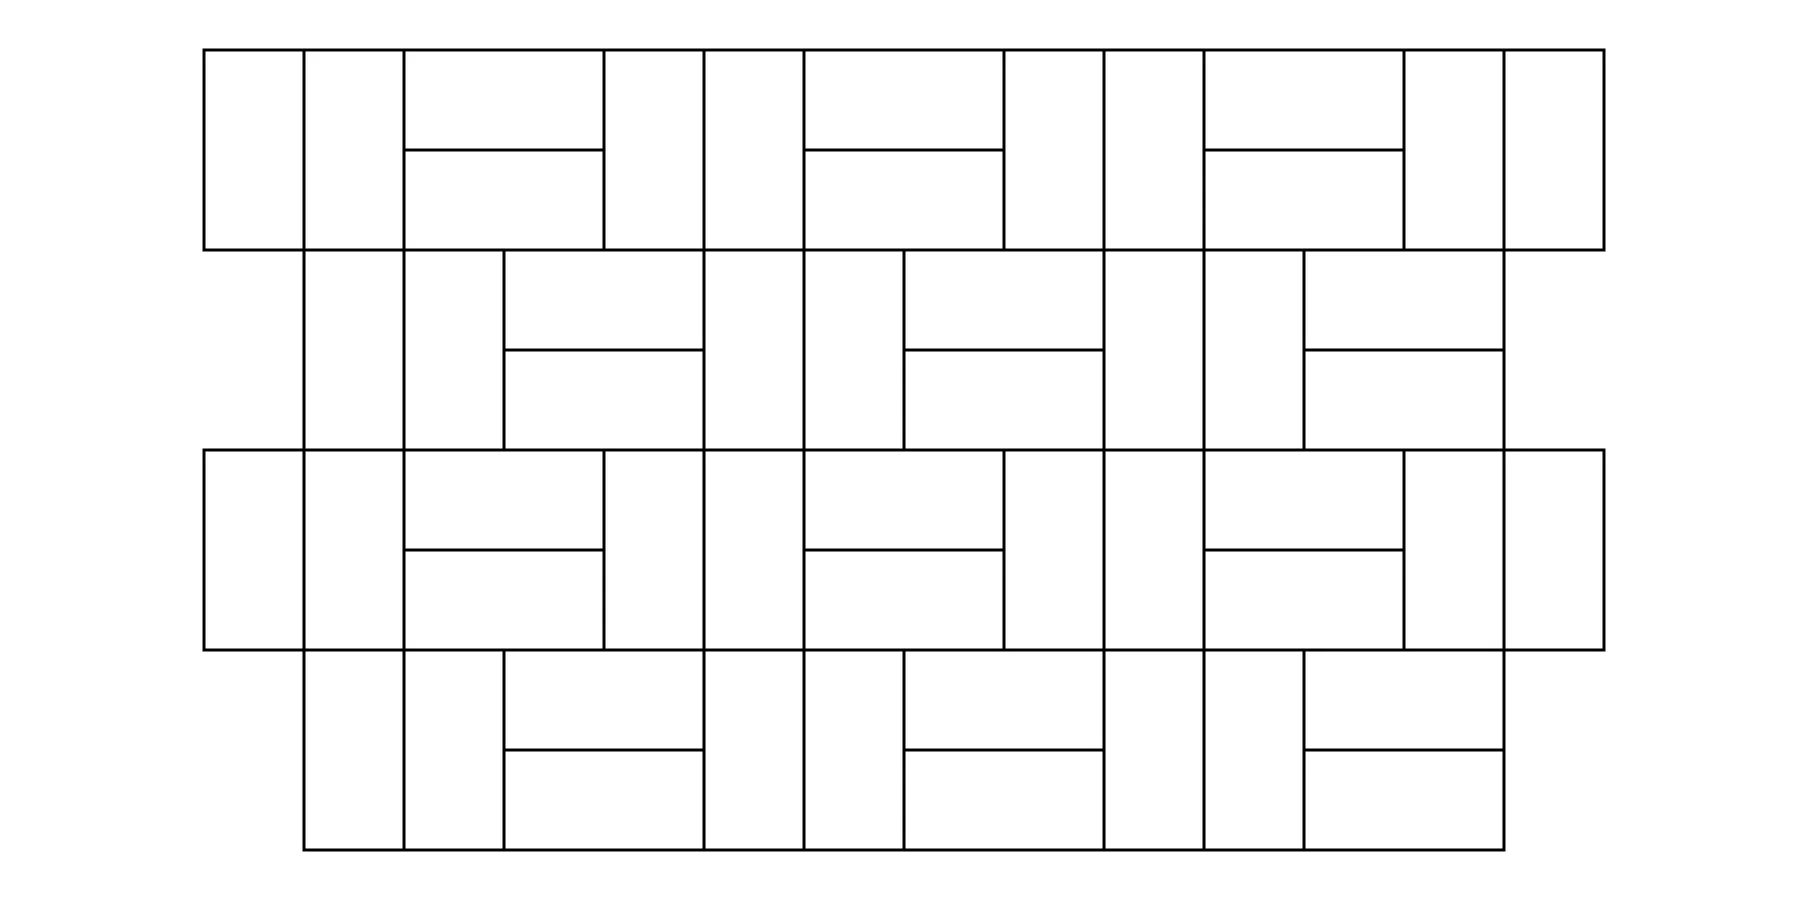
This is similar to the horizontal version but starts vertically. Two bricks are stacked vertically, followed by two laid horizontally. The pattern is then repeated across the area.
Basket Weave Diagonal
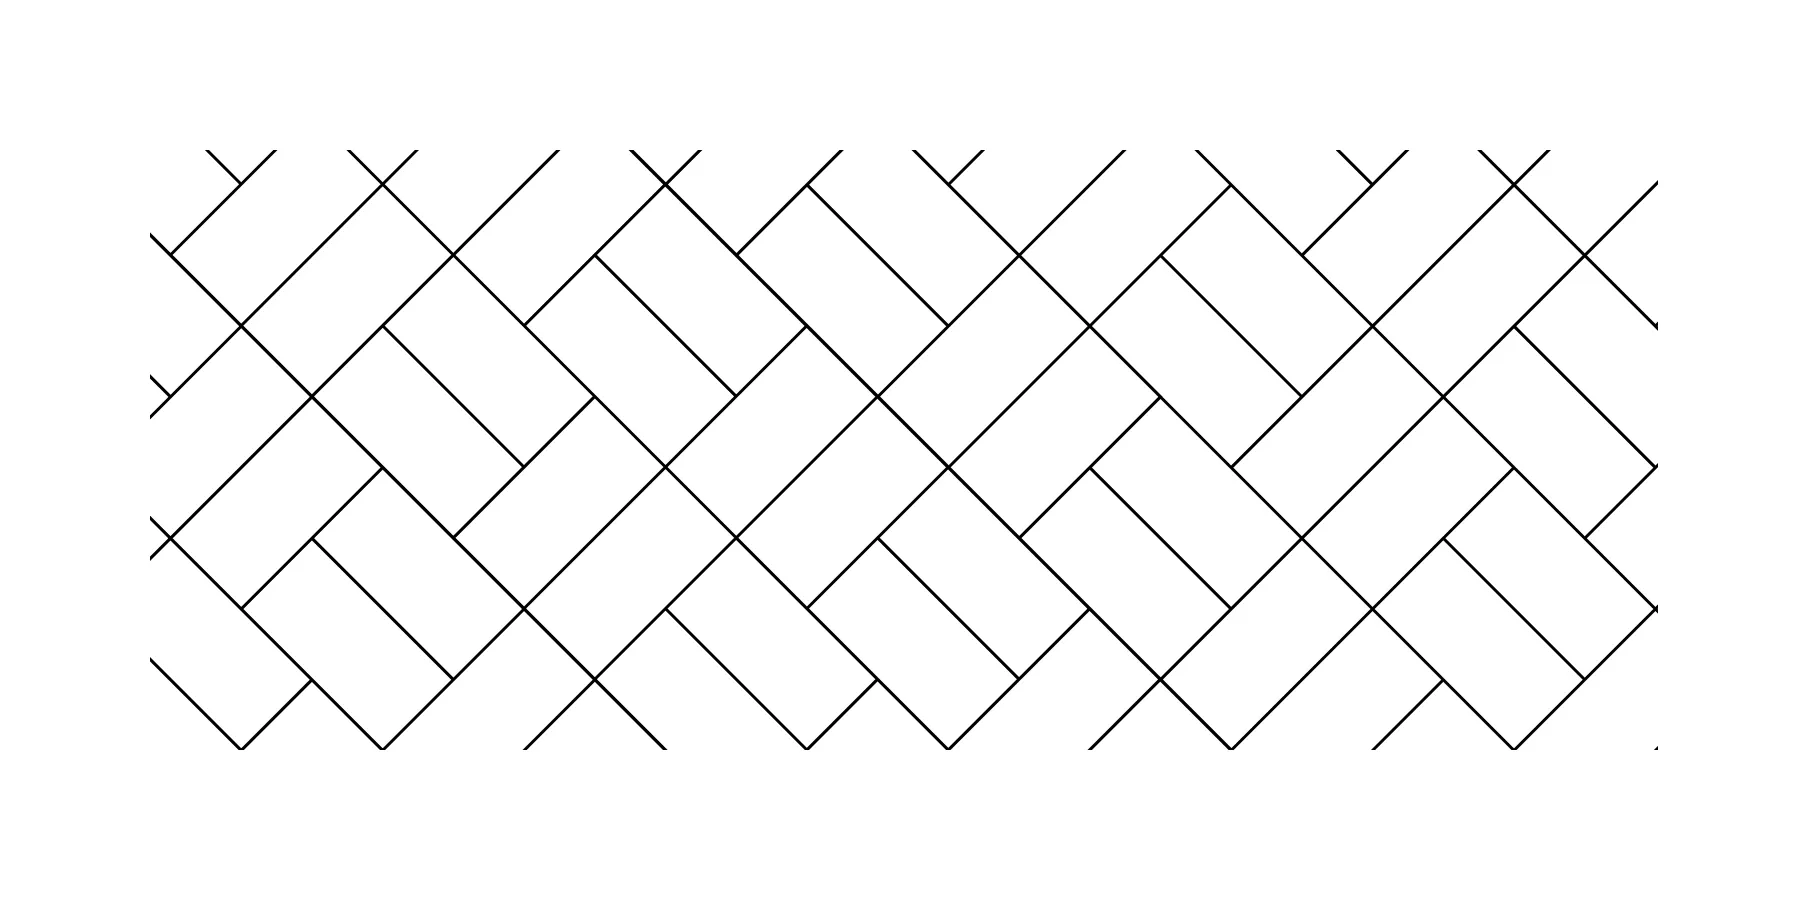
This variation sets the basket weave pattern at a 45-degree angle, creating a diamond effect.
When choosing a pattern, several factors come into play. The size of the room or space can influence the pattern; for instance, larger patterns might be overwhelming in a small area, whereas a small pattern in a vast space can feel busy. The desired ambiance and design style also matter. Some patterns, like the Running or Flemish bonds, are more traditional, while others, like the stacked or herringbone, can feel more modern.
The installation complexity can vary with the pattern. For example, the running bond might be far simpler and quicker to install than the herringbone or pinwheel, which requires more precision in cutting and laying the bricks. Installation patterns also impact the cost. The more complex the pattern, generally the higher the cost to install.
Post Installation

Unilock
Post-installation is as crucial as laying the bricks themselves. Once the bricks are laid and the mortar has set, it's essential to let everything cure properly. The curing period can range from a few days to weeks, depending on the type of mortar used and environmental conditions. During this period, it's vital to prevent foot traffic on freshly laid bricks, as this can affect the settling process and lead to uneven surfaces or dislodged bricks.
After the curing period, cleaning the bricks to remove any mortar residue, dust, or debris is necessary. Bricks can then be painted or sealed, depending on the chosen finish. Sealing the bricks can offer additional protection for certain applications, especially in moisture-prone areas or places with high foot traffic. Sealers can prevent stains and water damage and even enhance the color of the bricks. Moreover, bricks might need re-pointing (repairing the mortar joints). Regularly inspecting the mortar and the bricks can help identify areas that need attention, ensuring the longevity of the brick structure.
Conclusion
Brick installation combines precise planning, skillful execution, and attentive post-installation care. When done correctly, brick floors can blend timeless beauty with enduring strength that lasts generations.
Up Next:

Finishing Brick Floors: Stains, Sealers and Paint Guide
Project Guide:
Plan Your Interior Flooring